10 Home Maintenance and DIY Tips
There’s no doubt about it, being a homeowner is a big job.
Unlike an apartment complex where the maintenance crew takes care of the yard work, regularly cleaning the gutters, pressure-washing the buildings, turning outdoor faucets on and off with the season, replacing A/C filters, tuning up the HVAC systems, and more, now you’re stuck with all these jobs because you’re the homeowners.
The reality is ALL houses need occasional repairs and maintenance. And outsourcing every home maintenance task you need to get done can start to add up very quickly. Luckily, basic home maintenance tasks don’t cost much money or time. Staying on top of tasks like these can save money in the long run.
In this guide, you’ll learn 10 home maintenance tips you can’t ignore if you want your home to stay structurally sound, maintain low running costs, and retain its full value.
But first…
When You SHOULDN’T Do Your Own Home Repairs
While most little chores are fine to handle on your own, you shouldn’t try and fix everything. If the consequence could result in extra damage, cost exponentially more, or you could severely injure yourself or the house, it’s better to let a professional handle the repair.
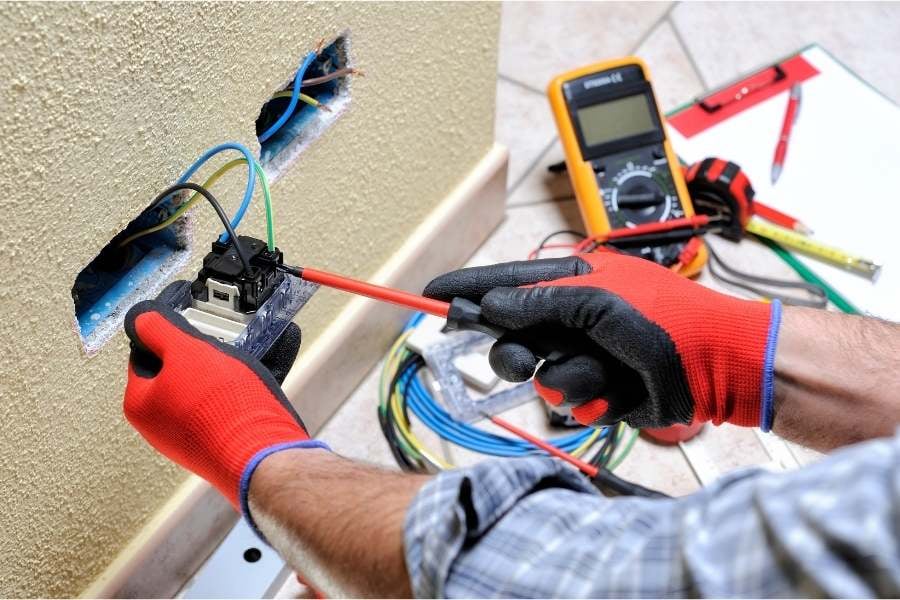
You also have to ask yourself if it’s worth your time to learn something new rather than pay for the services of someone who already knows the correct and safe repairs for electrical rewiring, asbestos removal, mold removal, major plumbing, roofing, structural changes or modifications, pest infestation, water damage, etc.
Table of Contents:
1. Clean the gutters ^
There’s a reason why cleaning gutters is often at the top of most home maintenance lists. Ignoring this basic chore can lead to a cascade of issues that could cost hundreds or even thousands in other repairs. Clogged gutters can keep water from draining off your roof, leading to roof damage and leaks, which in turn can cause ceiling and wall damage, and even mold and foundation problems. Get the picture? Sure, it’s a big pain in the you-know-what to get up on a ladder to blow the leaves and dig debris out of the gutters, but this is one chore you don’t want to ignore.
Gutters should be cleaned at least twice a year, in spring and fall. It’s also a good idea to check them after a heavy rain to make sure they’re free of clogs and the downspouts are working.
Prefer a visual? Follow the steps in this handy video from Lowe’s:
2. Inspect your window and door seals ^
Once or twice a year, take the time to seriously inspect the sealing around your windows and doors. Small cracks and fissures can lead to an inefficiently heated or cooled home, which in turn can overwork your systems. Every summer, you should inspect the outside of your windows and replace any missing caulk. Remove any cracked, dry or otherwise damaged caulk with a sharp knife and replace it with a fresh bead. This prevents drafts, helping to keep your energy costs low and your home comfortable. Applying an insulating film to your windows during the winter can further reduce drafts and increase efficiency.
3. Regularly clean refrigerator coils ^
Over time, all kinds of dust, grease, and dirt get stuck to the coils behind your refrigerator. It makes your appliance inefficient at best, dangerous at worst.
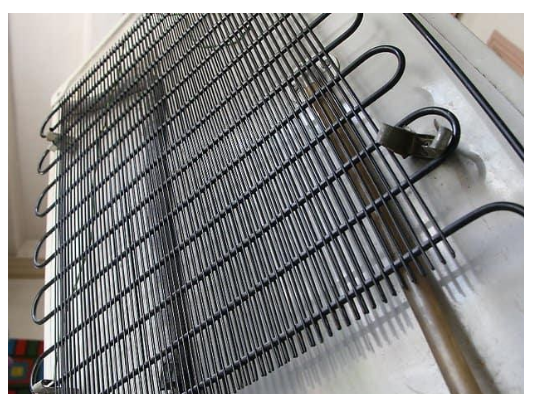
The coils are what your fridge uses to cool down, so if they are insulated, the fridge will have to work harder to get colder, or overheat.
The best way to clean the coils is with a vacuum cleaner. Unplug the fridge, pull it away from the wall and find the coils. They should be either behind a metal plate at the back, or behind the fridge under a grill lower down. They look like this:
Use the brush attachment of your vacuum, and work the grime away without forcing it. Use a cloth to gently wipe them down to catch anything the vacuum missed.
4. Flush your water heater ^
Have you had to dance in the shower because rather than enjoying the hot water, you instead received ice-cold water? Well, water heaters are just like other appliances that need maintenance to increase the longevity.
There are two main reason that this could happen. Either your water heater has a broken unreplaceable part and needs to be replaced completely, or the sediment inside the water has caused damage to the bottom of your water heater. In the latter case, you would need to drain the water from your heater and clean the inside at least once a year.
To drain your water heater, turn off the water supply and power to the heater. If you have an electric heater, you can simply turn off the power to the machine. Next, connect a water hose to the drain fitting at the bottom of the tank and begin to drain all the excess water inside of the tank. Make sure to open the drain valve on the water heater so that all of the sediment on the bottom of tank would be removed during the process. After draining all of the sediment, close the drain valve and refill your tank before you turn the power back on as well as the main water supply.
Because sediment can build up in your water heater and wreak havoc, it is important to flush it regularly. Here’s how. You can also click here for another great video.
5. Clean out the dryer hose ^
6. Fix a leaky pipe ^
Experiencing a leak is an inevitable aspect of owning a home. No matter how much maintenance time you put in, pipes can still become damaged and, unfortunately, shoot water where it shouldn’t be which can cause a lot of damage to your home if left untreated. There are many temporary fixes for leaking pipes you can use, such as epoxy putty or pipe clamps, if you don’t want to call a plumber just yet.
Check out this article by Home Depot to learn the different methods to fix leaky pipe or check out these two videos to fix a metal or plastic pipe. However, there are many kinds of piping that require different methods to fix a leak. YouTube has many great videos to search and find what suits your plumbing needs.
If the leak is from a drain pipe inside the wall or simply beyond what you can DIY, consider calling a professional.
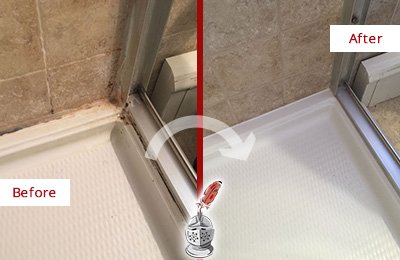
7. Recaulk your tub, showers, and bathroom fixtures ^
Whether you have grout or caulk as a filler between your tiles in the bathroom, it will exhibit signs of wear and tear over time. If you notice any crumbling, peeling, or mildew, it’s probably time for a touch-up.
If you clicked the link to learn how to recaulk windows and doors then you already know what to do. If you need to see a visual, click here to see how to remove and apply new caulk.
8. Maintain the quality of your roof ^
When it comes to roofing, it’s often the things you don’t see that make the biggest impact. But how do you take care of your roof when you can’t always see the things that matter most?
The good news is that you don’t necessarily have to take to the rafters to maintain your roof – there’s a lot you can do with a ladder and a little bit of elbow grease. Check out these 8 roof maintenance tips to help you make sure your roof is in peak condition year-round.
9. Touch up exterior paint ^
Exterior paint (and interior paint) can easily bloat up during rainy seasons especially when you don’t have any waterproofing paint. You can avoid this by doing a paint job every so often to prevent wear and tear from the sun and rain. If you have any leftover paint, you can use this and simply roll the paint over the torn or dirty spots on your walls.
If you don’t have any leftover paint, make sure to inspect which walls need any retouching and eyeball how much paint you would need to your retouching project.

:max_bytes(150000):strip_icc()/exterior-paint-satin-or-flat-1821061-hero-9cf8b9fb3e1a40a5a256eafac9e9474a.jpg)
For a more extensive paint job, you’ll want to make sure the walls are well prepped. Plan to devote an entire summer to prepare and paint even a medium-size house. Completing a top-quality exterior paint job requires more than patience and perseverance. You’ll need a sharp eye, a steady hand and a bit of practice to paint crisp, straight lines. In addition, you’ll need the strength to move and set up tall ladders, and the confidence to work from them once they’re in place.
10. Inspect your HVAC system ^
70% of residential HVAC systems are performing below standard. It’s often ignored even though the heating ventilating and air conditioning (HVAC) system is one of the most important components of your home’s ecosystem. The HVAC system helps keep you comfortable by circulating air throughout your home and filtering out allergens in the air. The HVAC system is what also allows us to maintain enjoyable indoor temperatures separate from the outside environment.
Many homeowners aren’t even aware their HVAC system is running inefficiently until it completely stops working or causes an increase in the energy bill. At this point, many homeowners will then contact their local HVAC company where they’ll be recommended to buy a new replacement system. This reactive approach to servicing your home’s HVAC system is more expensive and often times avoidable. HVAC systems typically don’t break overnight, instead, they slowly become inefficient over time with a series of small malfunctions throughout the system.
Most HVAC units are a “split system.” This just means some of your components are indoors, and some are outdoors. For the next step in your DIY HVAC inspection, head outside to make sure that your outdoor unit’s compressor and blower are in good condition. The outside unit can usually be found behind or to the side of the house on a small concrete slab.
Now head indoors and locate your furnace. Here is a detailed video the explains how to inspect and maintain your furnace. At least once a month, your should change the HVAC filters which help by preventing dust and debris from getting in and slowing things down.
Also, browse through this guide full of tips from Habitat supporters. You’ll learning about energy saving, cleaning, decorating, yard and gardening tips, and more!
Check out our latest posts!